How Do I Plant the Cover Crop?
There are two main methods to plant cover crops – drilling and broadcasting.
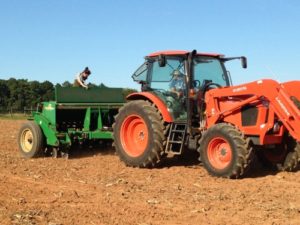
Drilling
Usually, the most consistent cover crop stand is obtained by using either a no-till or a conventional drill. Conventional drills are designed to plant into a prepared seedbed. No-till drills, which are heavier, can slice through crop residue easier using a coulter mounted in front of the openers combined with the additional weight. There are many different manufacturers and ways to set up your drill. You should be familiar with the operator’s manual for your particular drill. A good introduction to grain drills and planters can be found here.
Regardless of which type of drill you use, the tips below will help ensure planting success:
- Check the seed boxes and drop tubes. Spiders particularly love to build webs inside drop tubes and will clog them up. Use an air compressor to blow the drop tubes out and a flexible wire to make sure they are clear. Planting a field to find missing rows is a frustrating experience.
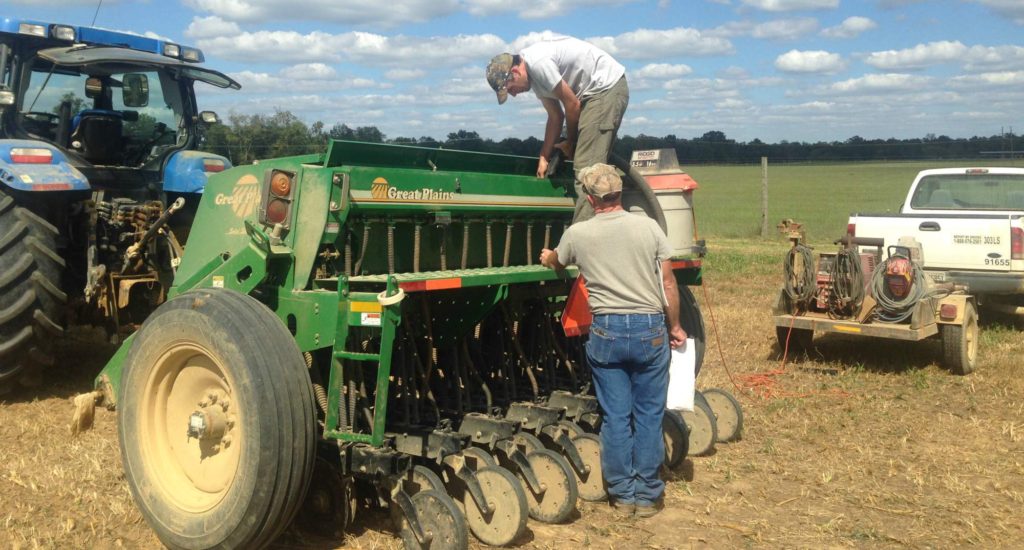
- Consult a rate chart and calibrate. Drills should have rate charts for settings to obtain a particular seeding rate. Some charts are on the seed boxes, others are found in the operator’s manual. These charts are a good guide but because seed sizes vary considerably even within a particular species, the drill should be calibrated to make sure you are planting the right amount of seed. Too little seed can minimize cover crop benefits, while too much seed increases costs. Calibration is not difficult. There are a number of methods, but here is a simple and accurate method that will work for conventional and no-till drills.
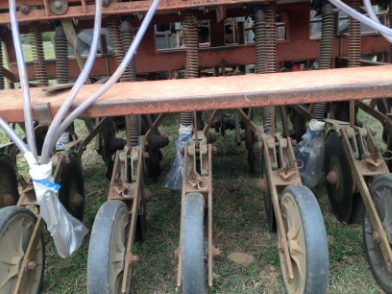
No-till drill.
As you are calibrating the drill, walk behind the drill to check that a) seed is dropping from all tubes, b) the seed is being placed at the correct depth (see below), and c) the furrow is being closed.
- Adjust for proper seed depth. For specific cover crops, seed depths are often given as a range such as ½ to 1 inch. Seeds need to be placed at the right depth. Too deep can hinder emergence, while too shallow can limit germination because the shallow zone can dry out faster. Seed placement may also depend on soil moisture conditions and the forecasted weather. In some cases, seed should be placed a little deeper to take advantage of soil moisture below a surface dry layer. In wetter conditions or prior to forecasted rainfall, the seed may be placed towards the shallower end of the range.
Seed depth will be set on the drill by adjusting the downpressure, the gauge wheels (if these are present) or the press wheels depending on the drill. A good general rule is the furrow opener should move through the soil at twice the desired seed depth. For example, if the seed should be planted at ¼ inch, the furrow opener should be set to ½ inch. There is a limit to this. Most drills will not allow the furrow opener to penetrate deeper than 2 inches depending on the soil type and condition.Some small seeded cover crops like clover need to be planted very shallow. A small seed box is needed to get these seeds metered out properly. Getting the right depth for small seeds like clover may be difficult with heavier no-till drills. In many cases, drop tubes from the small seed box can be pulled out to drop the seed on the soil surface ahead of the press wheels to keep the seed shallow.
Check the planting depth by inspecting the furrow and digging down a short distance to find the seed. One trick to help you find seed that isn’t inoculated or coated, is to very lightly spraypaint seed spread out on a plastic tarp or newspaper. A light coat of orange or red color will make the seeds much easier to find. You should lightly coat only enough seed to fill all the cups in the seed box. It doesn’t take much paint. A heavy coat of spray paint will gum everything up and could potentially alter the seed size to give you the wrong seeding rate.
 A note on cover crop mixtures. Some farmers are using mixtures with as many as eight to ten cover crop species with the goal of increasing biodiversity and increasing soil health. These mixtures often contain a wide range of seed sizes. There seem to be two schools of thought in terms of drilling these mixtures. Some farmers, mix all the seeds into the large seed boxes and plant. Others put small seeded legumes and brassicas in the small seed box and the larger grain seeds in the large seed box. Both methods can work.
After calibration, make sure all the seed tubes are reattached. Once you are ready to plant, remember to check the seed boxes to ensure these are full. It’s always a good idea to check the drive mechanism and seed boxes periodically while you plant.
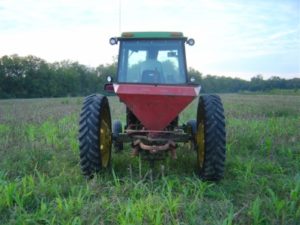
Broadcasting
Many farmers broadcast cover crop seeds to help them cover large acreage in a relatively short period of time during the busy harvest season. Broadcasting also can help get cover crops planted earlier than if the producer waited until after harvest to drill. Spreaders can be mounted onto ATVs, tractors, high boy sprayers or other equipment to broadcast the seed. Others mount spin spreaders to high boy sprayers and broadcast cover crop seeds while spraying.
Use these tips to help ensure planting success:
-
- Check soil moisture. Germination of broadcast cover crops seeds is greatest if there is sufficient soil moisture. Residue from previous cover crops or cash crops can improve germination.
- Increase seeding rates. Seeding rates should be increased by 20 to 50%. Broadcast seeding is much more effective with very small seeds (e.g. clover) than with very large seeds (e.g. cowpeas).
- Take care when mixing with other products. Mixing the cover crop seed into lime or fertilizers and applying in one pass, reduces labor but may reduce the cover crop stand. Some fertilizers will cause ‘salt burn’ that damages or otherwise renders seed non-viable.
- Calibrate the spreader. Just like the drill, the spreader should be calibrated. Know how wide a swath the spreader will cover and the spread pattern. Information on calibrating a bulk dry fertilizer spreader can be found here. The method can be adapted for mounted spreaders.
- Planting windows. Adequate soil moisture is the greatest limit on when crops can be planted. There are several windows when fall or winter cover crops can be broadcast in the Piedmont. These include:
- Before cotton defoliation. This option has worked well for producers and generally produced adequate cover crop stands.
- After cotton harvest before mowing stalks
- Before soybean leaf drop.
- After corn harvest. This can be problematic during dry conditions due to the heavy corn residue.
- In the Mountains and Ridge & Valley, the primary broadcast windows for cool season cover crops are:
- after corn harvest, and
- before soybean leaf drop.
Spring or summer season cover crops such as millets can be broadcast after small grains. It is harder to get a successful stand with the larger-seeded legumes such as cowpeas, soybeans or sunn hemp with broadcasting.
Additional Resources
Contributors:
Ronnie Barentine, Extension, University of Georgia; Julia Gaskin, Extension Specialist, University of Georgia; Dr. Jake Mowrer, Extension Specialist, Texas A & M University; Dr. Kip Balkcom, Research Agronomist, USDA ARS National Soil Dynamics Laboratory; Nathan Lowder, Soil Health Specialist, Natural Resource Conservation Service; Dr. Dara Park, Assoc. Professor Clemson University